
📄 Some content on this site was written with AI assistance and reviewed by Mileni Sabatini before publishing.
There’s something incredibly satisfying about the way a warm, creamy sauce clings to a perfectly cooked piece of pasta, making each bite a comforting embrace. When I make sauces, I always keep a ladle of the pasta cooking water on hand; that starchy liquid brings everything together beautifully and helps achieve the ideal consistency. This technique adds a lovely sheen to the dish, elevating it beyond everyday fare. With the right balance of flavors and textures, this meal becomes a staple that fits seamlessly into any weeknight rotation.
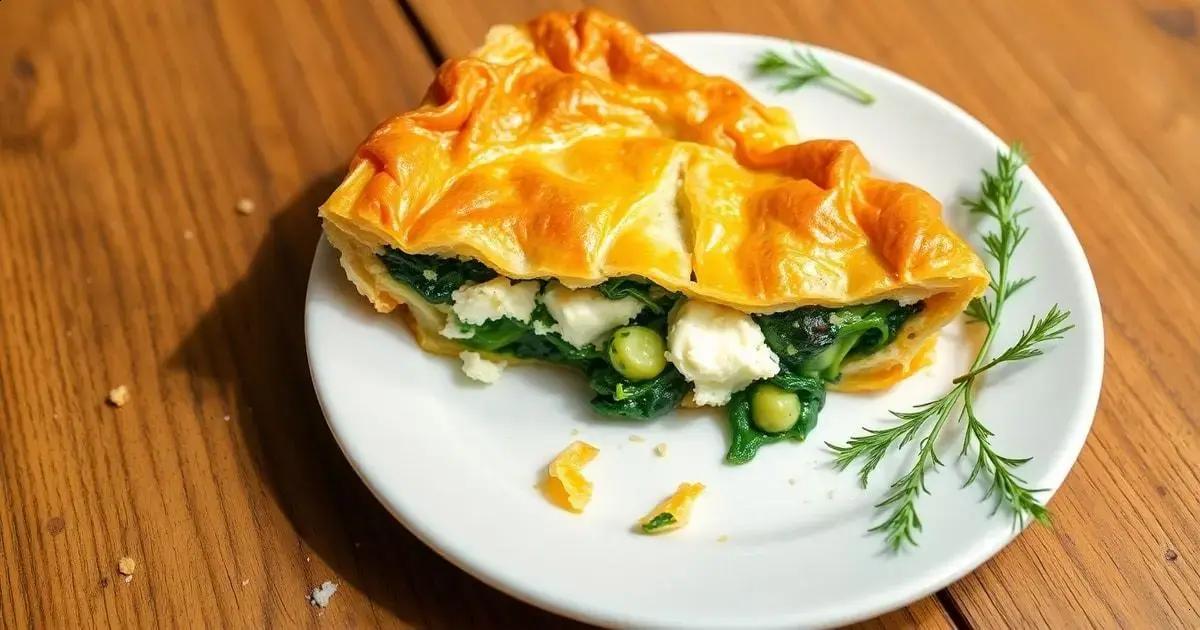
spanakopita
Ingredients
Method
- Wash and dry the spinach well. Slice into ribbons. Heat a large pan over medium and cook the spinach (in batches if needed) until wilted and the moisture has evaporated. Let it cool, then squeeze out excess liquid with your hands—don't skip this or your filling gets soggy.
- Finely chop the onion and garlic. In the same pan, add a splash of olive oil. Sauté onion on medium for 3 minutes, then add garlic and cook 1 more minute, until softened.
- In a big bowl, combine spinach, sautéed onions/garlic, chopped dill, parsley, crumbled feta, ricotta, eggs, nutmeg, salt, and black pepper. Mix until even—I use my hands for this because it's easier to break up the cheeses.
- Heat your oven to 190°C (375°F). Brush a 22x30 cm (9x13-inch) baking dish with olive oil.
- Place a sheet of phyllo in the dish. Brush with olive oil—don’t soak it, just a thin layer. Repeat, layering 5 sheets, brushing each.
- Spread the filling evenly across the phyllo base. Layer the rest of the phyllo sheets on top (5 more), brushing each one with oil. Tuck the edges down the sides if there's extra.
- Score the top layer with a sharp knife into serving-size squares—not all the way through, just to cut the top layers.
- Bake on the middle rack for 40–45 minutes, until the top is deeply golden and crisp. If it looks pale at 35 minutes, rotate the dish for even browning.
- Let the spanakopita rest 10 minutes before slicing. I use a thin, sharp knife to avoid tearing the phyllo too much.
Notes
Tips for real spanakopita results at home
Make sure every bit of spinach water is squeezed out. I pile all the cooked spinach into a clean dish towel, twist, and press over the sink—messy but no soggy pie. Don’t rush this part; wet spinach ruins the layers. If you’ve avoided phyllo out of fear, you’re not alone. My workaround: keep the stack covered with a barely damp towel and work quickly, but don’t panic if it rips. Patch pieces under the next sheet—no one will ever know. The step that surprises people? Cutting the top layers before baking. If you wait until it’s cooked, the crust shatters everywhere. Score with a sharp knife but don’t dig all the way through.Swaps and what actually works
No ricotta? Greek yogurt (not nonfat, please) can work in a pinch. Cottage cheese is okay but makes it a bit wetter—just make sure to drain it first. Don't try to swap the feta for mozzarella or cheddar unless you want something completely different. I’ve used frozen spinach and it works, but defrost and squeeze out every drop of water—seriously, I use both hands and a potato ricer. Fresh herbs matter here. Dried dill just tastes dusty.Make-ahead and storage
Spanakopita keeps in the fridge up to 3 days. I reheat slices in a pan over medium heat with a splash of water in the corner and a lid—restores the crunch without burning. If prepping for later, assemble all but the top few phyllo layers, keep covered in the fridge, and finish layering and baking the day you want to eat it.This spanakopita shows up in my kitchen when I’ve got a bundle of sad-looking spinach or a bit too much feta. My family never complains because the crispy phyllo and savory, herby filling hit all the right notes for dinner or lunch leftovers.
Tips for real spanakopita results at home
Make sure every bit of spinach water is squeezed out. I pile all the cooked spinach into a clean dish towel, twist, and press over the sink—messy but no soggy pie. Don’t rush this part; wet spinach ruins the layers.
If you’ve avoided phyllo out of fear, you’re not alone. My workaround: keep the stack covered with a barely damp towel and work quickly, but don’t panic if it rips. Patch pieces under the next sheet—no one will ever know.
The step that surprises people? Cutting the top layers before baking. If you wait until it’s cooked, the crust shatters everywhere. Score with a sharp knife but don’t dig all the way through.
Swaps and what actually works
No ricotta? Greek yogurt (not nonfat, please) can work in a pinch. Cottage cheese is okay but makes it a bit wetter—just make sure to drain it first. Don’t try to swap the feta for mozzarella or cheddar unless you want something completely different.
I’ve used frozen spinach and it works, but defrost and squeeze out every drop of water—seriously, I use both hands and a potato ricer. Fresh herbs matter here. Dried dill just tastes dusty.
Make-ahead and storage
Spanakopita keeps in the fridge up to 3 days. I reheat slices in a pan over medium heat with a splash of water in the corner and a lid—restores the crunch without burning. If prepping for later, assemble all but the top few phyllo layers, keep covered in the fridge, and finish layering and baking the day you want to eat it.